Sunday 17 August 2008

Bashful Fairy ATC


I made this ATC using a picture that I have taken of a toadstool in my garden.
Using my Adobe programme and using 'Layers' I was able to
remove the background and other eliments of the original Fairy picture, and place her on my own picture of my Toadstool.
Now I can say there ARE fairies in my garden, LOL.
I had great fun doing this and I want to experiment more, so........ watch this space LOL.

Thursday 14 August 2008

The garden taking shape


I moved into the bungalow on the 19th of July.
The council removed three large trees from the garden, as there were far too many, and several overgrown hedges and shrubs, were either removed or cut back allowing more light into the garden.
My son in law has put some of my favourite shrubs in for me and dug the border shown in the picture, Which I put my plants in today.
The inside of the bungalow is lovely with a large spacious lounge, decent sized bedroom, and I now have a small computor /craft storage room, which I didn't have before, so I am a very happy Bunny. LOL

Tuesday 8 July 2008

Part of the garden to my bungalow


The picture is a small part of the garden to the bungalow, There is evidence that it once was a very beautiful garden, it has character and cries out for someone to love it. I do, and fortunately so does my son in law Tess and the twins, who have all promised to help make it beautiful again.

I haven't added anything to my blog for ages, as I have had a lot to do getting ready for my move to the bungalow. The bungalow has only one bedroom, at present I occupy a two bed roomed flat.
I am/was a hoarder, so accumulated "junk" had to be sorted.
Have I used it in the last year? no, so out it goes.
Not as easy as it sounds. for instance regarding a big bag of pieces of soft leather.....have I used it in the last year?, Yes. how much have I used? two small pieces. Am I likely to need it again? Yes. So with tears in my eyes LOL I sorted a few good sized pieces of different colours, into a tiny bag in comparison, and binned the rest.
This very slow method of sorting, finally achieved my aim of getting everything into one shelved double wardrobe instead of two, etc, etc,.
Not everything was binned, Some stuff would be useful to Angy's art and craft club at the school where she works, for instance several large oval or round shaped pieces of mountboard, Hoards of papers, most of which I had already scanned and saved on my PC, Beads etc etc.
I became a regular visitor to the local Sue Rider charity shop, and only once failed to resist buying new stuff to take back with me lol, and that time it was a pair of unworn comfy shoes, for £4.50 which proved to be a good buy, as they are blissfully comfortable, a rarity indeed for me.

Another view of the bungalow garden


This view shows a bit more of the garden looking from the opposite direction from the other picture, but there is loads more that runs down the side of the bungalow.
At the side near the front, there is a piece of garden enclosed by an unruly hedge, the council have promised to remove the hedge to give me more room to get my scooter in and out of the bungalow.
I intend to buy a shed which will go where there previously was one, near the fence but just out of view on the picture.
I will also have access to loft space to store such things as my Christmas tree, decorations, suit cases etc, being in a ground floor flat at present I don't have use of loft space.

Sunday 15 June 2008

Garden Blooms Needlefelt ATC


Here is my second attempt at needle felting. A bit more of my untidy embroidery this time, but as Nature isn't always tidy, I think I got away with it this time. lol
Now my brain cell is hurting, as I'm thinking what my next NF should be! Should I try a sea scape or maybe a tree Who knows!
One thing is for sure, I find it very relaxing, it's a bit like painting but with fibres instead of paint, so less messy lol.
Soon in the next 2-3 weeks I shall be moving to a gorgeous council bungalow, with my very own proper garden.
I will have to pack up all my other crafting gear for the move, but my needle felting box will stay by me, as it doesn't take up much room, then I can continue crafting in my spare moments between sorting and packing.

Saturday 14 June 2008

Hillside,

My first attempt at needle felting
Since Connie showed us how to needle felt, I have been itching to have a go.
Here is my first attempt, and Connie is right, it is very relaxing, and quite easy to do, and I didn't even mind doing the bit of embroidery on it, lol. Embroidery is not my best subject, but I am quite pleased with how it has turned out.
I hadn't got any of the coloured woolly stuff, except for some white kindly given to me by Connie.
So I found out my suede brush and some oddments of coloured felt, and after a couple of hours brushing, and a sore finger and thumb, lol, I had sufficient to get started.
Now I am eager to start another one, and see how the next one looks. Watch this space. lol

Sunday 8 June 2008

A day at Connies

left to Right. Me, my daughter Angy, my sister Brenda, Helen, and our Hostess with the mostest, Connie. Connie's lovely hubby John took the photo for me.

It was a lovely day, and we spent the whole time chatting about crafts, eating cakes and drinking tea, we ended up in the garden as the weather was kind to us.

Then Connie gave us a demo on needle felting, and now we're all itching to have a go.lol

Thanks for a day to remember Connie.

Friday 6 June 2008

Lady Violet and Encounter Sculptured heads


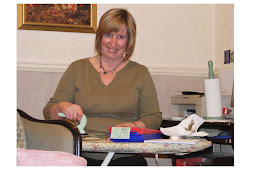
One evening I was busy "playing" with Fimo, I had made "Lady Violet" and layered her over some pretty glittery mesh fabric onto a shaving foam background, when my daughter Angy called.
"I want to play" Angy said, "Whats stopping you?" was my reply, lol.
You can't (or maybe you can lol) imagine the fun we had that evening as we created between us several very different heads.
While we were playing, we decided it would be a lot of fun to host a Sculptured head Swap on our forum on Docrafts.
Angy being the brainy one would be host, and I (useful sometimes lol) would be her buddy.
And so the Sculptured head swap was started. We gave what we thought was a long deadline 30th June. but the weeks are flying by so quickly lol, I'm just glad that mine are already made.
Angy tells me that they are arriving, but won't let me see them yet except one that was sent to me as a buddy RAK from Sherry, a very talented lady, and it's absolutely gorgeous.
I can't wait untill the deadline is reached, so that I will have the pleasure of seeing them all and helping Angy sort them. There will be some happy forum members when they start arriving on the participating forum members door mats, I'm sure.

Tuesday 3 June 2008

Make a Moo or two


I thought I would like to enter the "Make a Moo or two" Challenge.
Each Friday a new challenge starts, this week the theme is Beige/brown /cream.
They are both made from scraps and off cuts that I keep in a little box, should I need them, and now obviously I do, lol.
The first one "Quiet Time" I puched and added the little cream flowers, the title was already on the background, and I thought it was a good title for the little girl who appears to be saying her prayers, so a little bow beneath and some brown centers to the flowers was all it needed as I had already edged the card with brown ink and embossed it with holographic powder.
I stamped and edged the background for the second one "Flower Fairy" with my brown ink pad and again embossed it with my holographic powder. The little fairy didn't show up too well so I edged her with a brown Whispers pen, I hope I haven't spoiled her in doing that, but at least she shows up better. The knotted ribbon at the bottom and some ribbon pushed through from the back at the top, overlaid with a punched flower, two decoupaged leaves with a little flower left over from a previous project, gave me the finish I wanted.
My favourite is the one on the left "quiet Time" she has such a lovely little face, reminds me of my two eldest granddaughters when they were small as they too had/have lovely dark hair with soft curls like hers.

Monday 2 June 2008

Make a Moo or two (Cats)


Each Friday a new challenge starts, this week the theme is Cats.
The first one "Ancestors" I printed two Egyptian cats the same, cut one out and gold embossed it, (I stamped all the cats with Stazon on matt silver card and cut them out, and gave them all green glitter pen eyes), I sewed the chains on from the back, then added the brads, and wrote by hand "Ancestors" on more matt silver card, then gold embossed the edges of the card.

For the second one "Curiosity" I printed the black cats face back ground on card stock, the silver cat is sat on some recycled packaging on which I added the blades of grass with the green glitter pen, the 9 and the count down 8-1 depict the cats nine lives (curiosity killed the cat!) I printed and cut the no 9 out of card, added Anita's 3 D clear gloss to the eyes of the background cat and to the no nine, and edged the card with silver embossing.

The third one "Cats love the sun" the background is from a recycled junk mail envelope (I love recycling lol) the letters are alternately, stamped on the background and stamped onto card and then stuck in place, I chalked the ones cut out, but it doesn't show on the photo, The sun and the edges of the card I silver embossed added the gem to depict "Love" then put Anita's 3D clear gloss all over but around the gem and while it was still wet pressed the cat into it.
I look forward to doing more of these little Moo cards, which are much smaller than ATCs and so, more of a challenge.

Sunday 1 June 2008

A day at Bridgenorth


It seems ages since I was able to add anything to my blog, due to problems with my PC, that occurred after it being upgraded with a new motherboard.

Now thanks to my daughter in law Shell and, my grandson Richard and one new hard drive, more memory and a lot of tweeking, it seems to be working perfectly and much better than ever before (fingers crossed).

Sue and her Hubby Frank (aka Frankiesue) came to stay at a nearby hotel last weekend , so that they could spend some time with Angy and her family and myself.

Would't you just know, that I had to go and get a nasty tummy bug, so was unable to join them at the meal out on Sunday.

Feeling a bit better on Monday I enjoyed the day out to a local beauty spot with them, a quaint olde worlde town called Bridgenorth. The weather was a disappointment though, with gale force winds and it threatened rain, which we were able to avoid by having a very nice meal in a fish and chip restaurant there. Despite the weather we all had an enjoyable day together and Sue and Frank have promised to come again soon.

I forgot my friend Connie's advice to strap my new camara around my neck LOL, and forgot to take it with me, but Sue took some photos for us to remember the occasion, and if she lets me have one or two , I will put them on my blog at a later date.

This picture I got from Google again. It seems that I will never learn LOL.

One twelth scale trees


This is a picture of the two trees that Angy and I made as a project for our Dolls house club. Angy asked me to finish hers off as she was busy getting her B A with honours degree. Well done Angy I am very proud of you.
I knew Angy was hoping to make her tree as a blossom tree, so I thought I would surprise her and have a go at making it into a Magnolia tree. (The one on the right).
Mine has just leaves, punching the leaves and attaching them was a very tedious task, I ended up with very sore shoulders and chest lol, now I can see that about at least as many leaves again are needed for it to anything like resemble a real tree LOL (maybe sometime later , when and if I can find the patience.
It doesn't show up very well on the photo, but the trees are planted into "Soil" make from used teabags and PVA glue with added moss and paper foliage. We made the trunks and branches with florists wire and I covered them with PVA and pieces of kitchen towel, before painting and adding Leaves/Magnolia blossoms.

Saturday 17 May 2008

I made this ATC for Wyvernsians Mesh Swap


Far too much gold embossing, I didn't like it at all, untill I added my all time favourites Accent beads. Now I think it's at least passable. The mesh is over gold card, not very noticable on the piccie, but gives it a bit of sparkle in the hand.
Oh well!, you can't get it right every time, somebody might like it.

Friday 16 May 2008

Believe Angel ATC


It'a a cold wet miserable day today, woke up full of aches and pains and stiffness, so I thought I would do some crafting till the pain and stiffness eases.

I have seen where people use bottle tops in thier crafting, so thought I would have a go with one that I found, while walking the dog.

I embedded the cut out face in deep impressions embossing powder, in the bottle top and put it in the oven to melt. I needed some wings for my Angel, and found some printed on a square of paper that came in a lucky bag from the Loughborough meet last year, stuck them onto card, cut them out and triple embossed them. Then layered them over some pink sequin waste, before sticking on the bottle top Angel.

The background is a piece of bronzy pearlised card which I clear embossed with a filigree type stamp, and then embossed around the edges with gold and also the stamped word "believe" at the bottom. I added two pink gems but thought they looked too pristeen, so I melted them to take off the sharpe contours and added a few small clear holeless beads.

I may send it to FrankieSues Angel swap on Docrafts.

Heart and Soul ATC


Heart and Soul I made last night.

I tried dabbing my lilac and blue Bingo dabbers onto the shrink plastic heart, and then shrinking it and then embossing it with my deep impressions powder. It appears Green on the picture but is actually a pinkie red.

The background is marbled with Shaving foam, and pieces of Alkohol inked tin foil and a piece of fabric mesh which surprisingly didn't disintergrate when I used the heat gun on it, but curled up a bit and shrank lol. A few accent beads and a couple of melted gems added then the edges silver embossed. the word "Soul" stamped on with stazon. Not sure yet but may send it to the Mesh swap, on docrafts.

Thursday 15 May 2008

Solder and Beads my third Gothic Arch


The third of my Gothic Arches, I wanted to be quite different from either of the other two, and as I have been itching to play with my soldering iron again, here was my chance!. lol
You can just about make out two little coils of thin wire on each of the crossed wires within the frame, and the beads can move freely on the wires. I looped the ends of the wires and attached fuse wire "tassles" to the loops on the sides and used brads to attach the frame to the mountboard in the top and bottom loops, the brads also go through the gold card, which I placed behind the frame.
I had previously attached the pretty mesh fabric to the mountboard, which is yet another one of the Shaving foam creations, made last Saturday. A couple of swirls of silver accent beads, pink gems and edging the mountboard with my gold metalics pen completed the project.

Monday 12 May 2008

Upgrade on my computer


On Sunday my Daughter in law Shell upgraded my computer

( Shell is a whiz with computers) So it left me with time on my hands and as the weather was glorious, I decided to take her youngest son, Christopher my grandson to a local beauty spot, an ancient farm, called Northicote Farm which is now listed and maintained for the benefit of the public. See small piccie of Northicote Farm, as it looks from the road.

We took Meggy my dog, as it is an ideal place for dog walking, with the nessessary dog waste bins amply provided.

I am not too good on my pins, but was feeling good, so thought if I take it steady with lots of sit downs on the logs provided, I would be okay.

I found myself cursing myself at my stupidity, for not bringing my new camara along as the views were breathtaking. This picture is one I found on Google, but is similar to what it was like in the woods on one of the many walks at the farm.

There are geese and a turkey and pot bellied pigs and other animals there as well.


Part of the listed building has been allocated as a tea room, with shaded tables and benches outside and a large bowl of water for the dogs. So I bought myself a large mug of tea, and an orange drink for Chris and we sat and ate Apple pie as well.

It was a really enjoyable afternoon and I and Chris loved it, and so did Meggy.
Chris is the younger brother of my frequently mentioned Twin grandsons Richard and Andrew, who help me so much with all my computing problems, and who helped me get this Blog started.

Wings and Things Gothic Arch


The background for this Gothic arch (made using the Shaving foam marbling technique as mentioned below) is so pretty, I tried not to cover it up too much.
I used two pieces of shrink plastic made weeks ago which I had coloured prior to shrinking with Caran Dache Aquarelle pencils, layered onto gold card.
I liked the effect of the wire used on the Shades of green Gothic Arch, so decided to add some wire wings to this one too.
Gems chosen to match the colours on the shrink plastic, looked a bit insignificant, so I added some of my (favourites) Accent beads. Edging the mountboard with my Gold mettalics pen gave it the finishing touch I was looking for.

My Gothic arches


Angy and I had another "play" with shaving foam again on Saturday LOL, the background I used for these two Gothic Arches are some of the results, on mountboard.

I love the background of Wings and things but the one on the left (Shades of Green and Gold) doesn't show up so well.

This is my first attempt at gothic arches, which I have made for a swap on Docrafts.


The ladies head on Shades of Green is made from fimo pushed into a mold I made from a metal plaque purchased from Tee Pee crafts.

I painted it gold and glued it into the base cut from a Caramel dessert tub, which I had painted with green and then a light coat of gold (Ocean Pearl) pearlised paints. I embossed the edges of the background with gold embossing powder. I then made a tag from some green recycled packaging, but thought it boring, so I lightly embossed it then cut it across twice with some deckle edged scissors, and left the gaps between the pieces. The clover leaf, or is it a Shamrock leaf! is also made from Fimo, and painted as with the head.

The dark green satin leaves were from a box of embellishments that was part of a gift for my birthday from my Grand daughter Emma.

Inspired by my buddy Nicks clever use of wire in her craftwork, I thought I would have a go at using wire as well, and I am glad I did, as I like the end results.

Thursday 8 May 2008

The Wood cutter and the Dragon clock


This is where my Dragon clock, (details below) now stands, beside the Chinese wood cutter, on my bookcase.

The woodcutter looks how I feel, smug and proud of his new friend the Dragon. LOL

My Dragon Clock


This is my first attempt at making a small but full size clock, I have made dozens of tiny 1/12th scale dolls house clocks, (not working of course) but this one works I am pleased to say and seems to be keeping good time.
I have used this image a few times for my ATCs, So for this project I needed to resize it to, 3 and 3/4" x 5 and1/2" and I printed it twice, one for the cutout Dragon which I triple embossed with my Deep Impressions embossing powder, I then gave him a red gem "eye". the other one for the background, which I strengthened with mountboard at the back . I then edged it roughly with Green Stazon hoping to give it an aged look, then embossed just around the Edge.
I used black Gems for the time markers, and put Brads in the corners.
Enlarging the picture, I noticed a little butterfly which I hadn't noticed before, (Must make that appointment with the optician, lol) So I found an image of a butterfly slightly larger than the one on the picture that I had printed previously on photo paper, I cut it out and added it to the picture with Silicone, slightly raising the wings for a 3 D look. Thats about it really, except for making a couple of stays on the back to make it free standing. I then spent the rest of today admiring it, as I am well chuffed, LOL . It now stands beside a statue of a Chinese wood cutter, on my bookcase, and the woodcutter looks like I feel, smug and proud of his new friend the Dragon. LOL

Tuesday 6 May 2008

The edge of Night and Copper Wings


I stamped these at the same "sitting" as the previous two. I must admit I am not too happy with the original, as I find the moth in front of the man a bit of a splodge, lol, and as I had just purchased a new little Butterfly/Moth stamp from Tanda Stamps, at a reduced price (an amazing 75p LOL) I decided I would see if I could cover up the splodge with a seperatly stamped image of my new stamp, using my copper pigment ink pad, (For Copper Wings) which I then cut out. and it worked.
Well..... for me anyway.
Okay, so I lost the moths feelers!, so I gave it new feelers made from copper fuse wire, which sort of frames the mans face. I attached the moth to the main stamped image while it was still sticky hot, straight after the first embossing, the last two embossings going over the whole thing, so that the moth is moulded onto the mans image.
The background was created with some more experimenting, I had kept some clippings of rubber, from trimming my stamps, and these I positioned onto an ATC sized piece of card, I cut out a piece of Kling-on cushioning the same size, and placed it sticky side down onto the rubber, thereby making myself a new background stamp, which would cling nicely to the acrylic block.
I used my home made background stamp with my copper pigment ink pad, on some black paper with a "leather look" finish, (which I had pinched from Angy lol) previously DSSTed to mount card. Hey presto! a distressed looking non descript Background. I feel quite proud of the overall effect.
......................................................................................................................................................
The one on the left which I've called The Edge of Night, was embossed with Copper sparkle embossing powder on yellowish mount board. The moth I stamped onto light brown mountboard with black Stazon , cut it out and triple embossed it and gave it thin fuse wire feelers (Hardly noticable on the piccie) I stamped the other two moths at the bottom using, a freebie kindly sent me by Tanda stamps, in my last order. I also stamped the two top corners with part of a corner stamp, one is a bit crooked but who says it has to be perfect??? lol. Then I chalked the blue border and rubbed my royal blue stamp pad around the edges, two royal blue smooth gems finish it off. This is my favourite of all the four. All available to swap.

Once in a blue Moon and You're my bestest friend.


I thought I would try out my new PaperArtsy stamps. The one on the right I stamped with black Stazon onto some yellowish mount board, then triple embossed it using my Deep impressions embossing powder, I layered it onto some torquoise pearlised card. I love torquoise and brown together, so thats the colour mountboard I used for the background. The shell and little metal rings are jewellary findings, and I attached them with Aroldite Rapid (Brilliant stuff, if you want something to hold fast and to dry fast).

The one on the left is stamped onto more torquoise pearlised card, triple embossed as before, but this time, I used a darker brown mount board for the background. Then out came my old favourites......Accent beads, with some slightly larger beads as well. The accent beads were a mix with some torquoise in there, but didn't look quite right, so I soon altered that with a coat of torquoise sparkle nail varnish. Both the background and the stamped card are edged with my gold Marvy Metallics Pen. I added the ice blue gems at the corners, as a finishing touch.

Saturday 3 May 2008

Opportunity ATC finished, Traded with Nicks


After crafting one night, (burning the Midnight oil as usual) I had trouble sleeping, and when I did finally drop off, I found myself still crafting in my dreams LOL.
I awoke next morning with the image on this ATC on my mind.
Whether I have seen a stamp of this image at some time and it stayed in my unconsious mind, or whether I generated it in my dream, I couldn't say, I just knew that I had to create it.
So a couple of hours later using my Adobe programme, this is what I came up with, well..... the printed image at least.
I cut out the image and embossed it with my Deep Impression embossing powder.
I used some brown pearlised card for the background, which I had stamped in the bottom right corner with one of my corner stamps, which I hadn't used before.
I then printed out the definition of "Opportunity", similar to what it said in the dictionary, and stuck it onto a tag cut from the same card as the background.
Then I made another tag with the words "Take It" and put it beneath the first tag, I then attached them to the ATC with a brad. On opening the tags there was a blank space beneath, that I felt needed something else, so I decided "don't look back" seemed appropriate to put there.
I felt that it still needed something else.... what would be appropriate to do with an open doorway??? and I came up with the idea that perhaps the Key that had unlocked the door, to allow access to the opportunity.
So after rummaging in my box of bits and bobs, jewellary findings, bits of Fillegree etc, I found what I was looking for, a little gold coloured plastic key.
Okay, So it's not an ATC that may appeal to everyone, and I may never be asked for it as a swap, but at least I have the satisfaction that I took the opportunity to Fulfill my dream. LOL
Well it seems my very good buddy Nicks wants the ATC, (Or is she just being kind? lol) who cares?, it means I am going to recieve one of Nicks fabulous creations in return, I couldn't be happier. Thanks Buddy.

Opportunity ATC with the tags open.

This is a photo of the completed ATC. with the tags opened

Wednesday 30 April 2008

Textured Pansy ATC


The background of this ATC I made weeks before, but couldn't decide until now what to do with it.


It is simply a piece of textured loo roll laid carefully onto a card spread with PVA glue, left to dry, and then when the PVA had hardened I painted another thin layer of PVA over it and allowed it to dry again.


Then I painted it with my Ocean pearl paints, by dabbing cream and gold on randomly and blending them in to give a patchy effect.


I stamped the pansy onto Polymer clay, and baked the clay in the oven for 20 minutes on one of my many indispensible wall tiles, then painted it with my equally indispensible Ocean pearl paints.


I then layered it onto a piece of purple recycled packaging, (if I remember right the packaging came with some tomatoes, or maybe it was mushrooms? lol )


Anyway back to the ATC, What came next? oh yes the accent beads, they are mixed shades of green, they don't show up very well in the picture, but believe me they ARE green.


I added the pinkie purpley ones around the packaging to soften the edge.


I felt it needed something else, so I added the gems at two opposite corners with a few of the green accent beads. I finished it off with a coat of glittery nail varnish over everything but the polymer clay pansy.


Doves in flight


My daughter Angy and I spent an evening together "playing" with shaving foam in a plastic food tray, we smoothed the top of the foam and added a few drops of glass paint, gently folding it in at the top of the foam with a cocktail stick, we then dabbed pieces of mount board (ATC size) onto the coloured foam then scraped the foam off the boards with the back of an old table knife.
The result was some pleasing background effects, and this ATC in the picture was made using one of them.
the Doves were stamped onto thin leather wrapped around a square of mount board, with a silver stamp pad and then embossed with clear embossing powder. I attached it to the background, and stuck silver cord around it, but didn't tie it as it wouldn't lie flat.
I added some little pearly white beads, some silver accent beads (I love those accent beads, lol) and a green gem.

Believe stamped ATC


I made some ATCs for a group swap on Docrafts.
The swap is called the Swat swap (stamping with a twist) where you have to stamp onto something other than paper or card.
This one I stamped onto thin leather, I then embossed it with Silver embossing powder.I also stamped the background as that is allowed.
The leather is wrapped around a piece of mount board. It is layered onto some pearlised paper,silver cord tied around it and silver accent beads added.
However I have not put this one in for the swap, as I made a few different ones to choose from which ones to send.

My porcelain miniatures


These are some of my 1/12th scale porcelain dolls house miniatures that I made for our Dolls house fairs.
I usually make the originals out of Polymer clay, and then make the mold with it, so that I could make several, as needed, but it was my daughter Angy that made the original for the very popular little Lady.
They have to be fired three times in all, at different stages.

Sunday 27 April 2008

Textured heart ATC


I made this ATC using the technique below.
Textured Stamping

This is fun to do, a bit messy, but I loved the results.

Take a piece of strong card about 2”x 2.5”. Mount board would be just fine.
Cut a piece of paper Kitchen Towel, or Loo Roll, slightly larger than your card.
Brush an ample layer of PVA glue onto the card, thick and even, (like spreading honey for the kid’s lol). Now take the paper and lay it carefully over the PVA’d card.

Take your DRY stamp, and press it down firmly for a few seconds, onto the paper and card, to make the impression, lift and wash your stamp immediately as the glue will have seeped through the tiny holes in the paper. Leave the paper in place, on the card.

Now take a steel ruler and using the edge press an outline around your stamped image.

Now put the card with your stamped image, on a tile or glass place mat or something similar, in a warm room, to dry, overnight would be best.

Once thoroughly dry, trim the edges, and paint, I used DecoArt Ocean Pearls very inexpensive and leaves a lovely pearly finish.

Now take a clear Ink pad and swipe it across your raised image, I then used Gold embossing powder, (silver works too), and heat with your heat gun.

It has taken me much longer to explain this technique, than to actually do, except for the waiting to dry time.

Try experimenting with different stamps, colours and embossing powders.
Add gems glitter etc, as desired.
Happy Crafting. Gwen xxx

My Altered matchbox


I thought I would have a go at an altered Matchbox, as I have seen several in peoples galleries on Docrafts that have inspired me.

I resized some of my favourite fairy pictures on my Adobe programme, cut them out, backed them with pearlised card trapping the ribbon between the two.

I resized another fairy image and printed it twice on paper adding the brown colour background, for the box and covered the sides of the little drawer with some of the brown paper too.

After covering the box I used Anita's 3D clear gloss then added a gem.

My altered Domino ATC


Alkohol inked background and domino, domino stamped with stazon, layered on recycled packaging, then accent beads and gems added, edged with my Gold inkpad.

This is my first try at making anything altered.

having an unsteady hand the doves are slightly blurred but I quite like the effect.